Android Things is Google’s OS offering for IoT scene. It leverages Android’ development tools and APIs and add new APIs to provide low level I/O and also offer libraries for common components like temperature sensors and display controllers etc. You can get the Developer Preview from https://developer.android.com/things/index.html, Raspberry PI 3 along with few other boards are supported. For PI3; there is an image that we burn to SD card; very similar to Rasbian and boot the PI connecting it to the Ethernet. We can identify the IP of the device either using DHCP Server or Wifi Router with Ethernet ports. Alternately; it has https://en.wikipedia.org/wiki/Multicast_DNS support that has become very popular in IoT devices; and Android Things board will publish itself as android.local on the subnet. Unfortunately Windows 10 “yet” doesn't support it “completely”; but we can install Apple’s Bonjour Service (it comes with iTunes; or install Bonjour Print Services) and can discover the IP of the device.
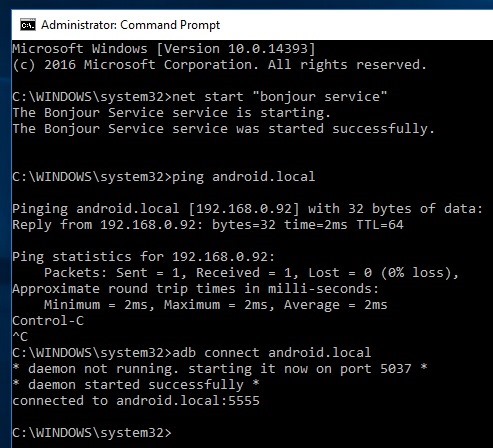
- https://developer.android.com/things/hardware/raspberrypi.html has additional information how we can start the WifiSetupService activity and it will connect to specified Wifi network and then we can disconnect the Ethernet
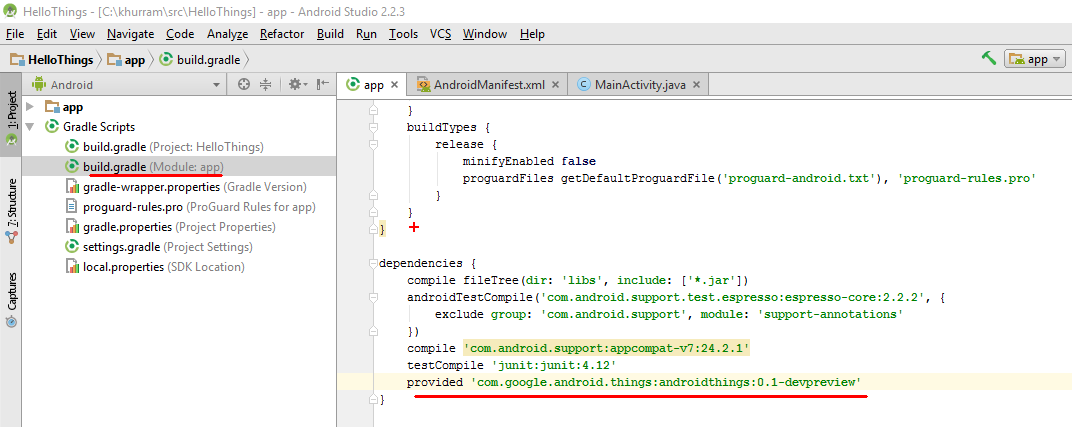
For the development; we will need Android Studio 2.2+. The SDK Tools should be 24 or higher in the Android SDK Manager. We will also need Android 7.0 (API 24) or higher. Create a project in Android Studio targeting Android 7.0 or above; and then add com.google.android.things:androidthings:0.1-devpreview dependency in module level build.gradle file
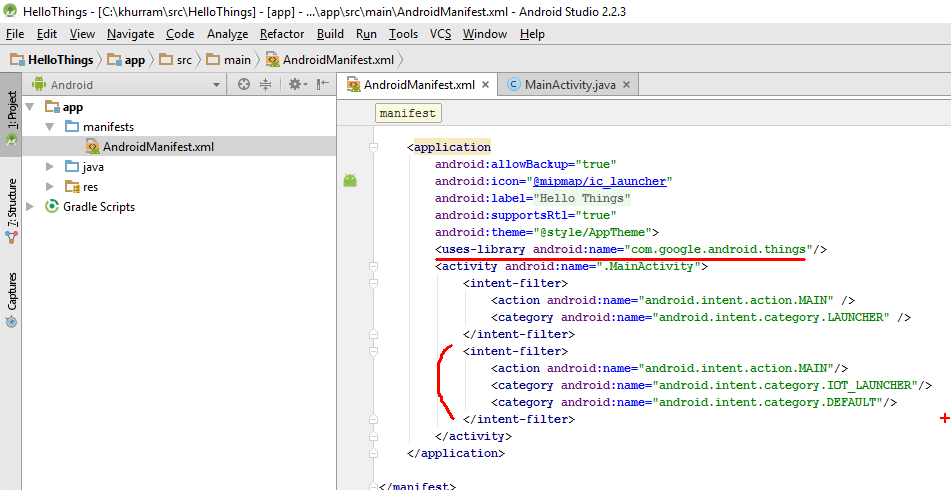
We also need to specify IOT_LAUNCHER category for intent-filter in the manifest file to declare our activity as the main entry point after the device boots
For our Blink; we will use Handler and Runnable for scheduling and blink logic along with PeripheralManagerService to access the GPIO pins. The code for our activity would be something like this
package pk.com.weblogs.khurram.hellothings;

import android.os.Handler;
import android.support.v7.app.AppCompatActivity;
import android.os.Bundle;
import android.util.Log;

import com.google.android.things.pio.Gpio;
import com.google.android.things.pio.PeripheralManagerService;

import java.io.IOException;

public class MainActivity extends AppCompatActivity {
    String TAG = "HelloThings";
    Handler handler = new Handler();
    Runnable blink = null;
    Gpio led = null;

    @Override
    protected void onDestroy() {
        super.onDestroy();
        if (null!=blink)
            this.handler.removeCallbacks(this.blink);
        if (null!=led)
            try {
                led.close();
            }
            catch (IOException e) {
                Log.e(TAG, "Failed to close the LED", e);
            }
    }

    @Override
    protected void onCreate(Bundle savedInstanceState) {
        super.onCreate(savedInstanceState);
        setContentView(R.layout.activity_main);
        PeripheralManagerService service = new PeripheralManagerService();
        //Log.d(TAG, "Available GPIO: " + service.getGpioList());
        //BCM17
        try {
            this.led = service.openGpio("BCM17");
            if (null == led) return;
            this.led.setDirection(Gpio.DIRECTION_OUT_INITIALLY_LOW);
            this.blink = new Runnable() {
                @Override
                public void run() {
                    try {
                        led.setValue(!led.getValue());
                        handler.postDelayed(this, 1000);
                    } catch (IOException e) {
                        Log.e(TAG, "Failed to set value on GPIO", e);
                    }
                }
            };
            handler.post(this.blink);
        } catch (IOException e) {
            Log.e(TAG, "Failed to open BCM17", e);
        }
    }
}
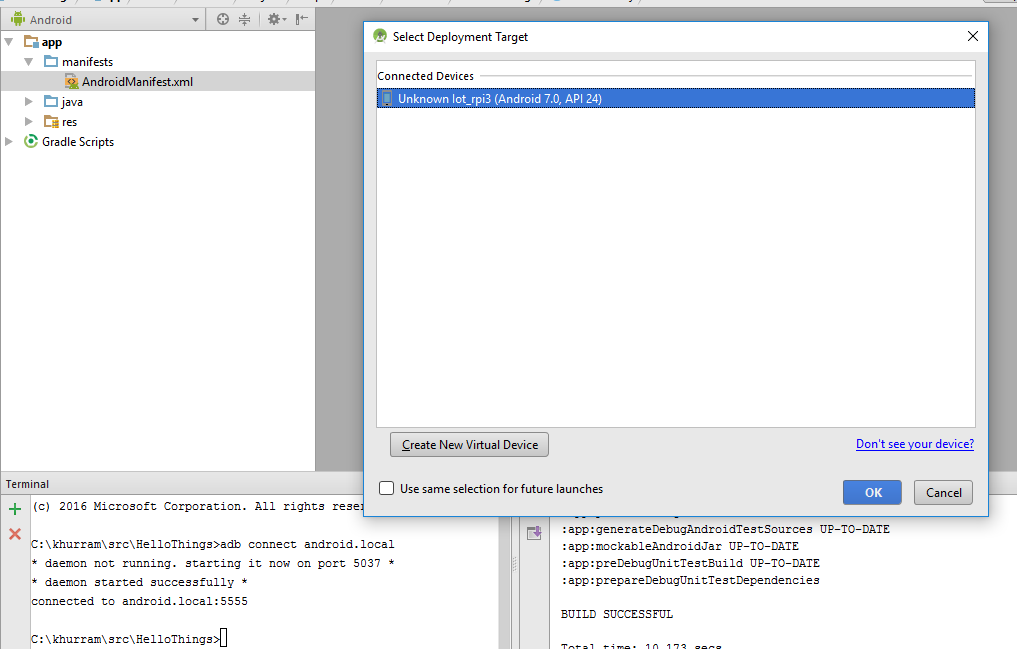
We can run/debug our application from Android Studio; given the Android Debug Bridge is connected to the device
- LED’s Positive/Anode side is connected to BCM GPIO 17 (GPIO0) / Header Pin 11 and its Negative/Cathode side is connected to Header Pin 6 (OV) similar to /posts/blink.html (Raspberry Pi Pin Layout is given on this previous post)
Similar to Windows 10 IoT; we can have graphical interface and when the application runs; it gets displayed over the HDMI on the Raspberry PI and we can connect USB mouse/keyboard and interact with the application.
Android Things Resources
- https://developer.android.com/things/training/first-device/index.html is a complete walkthrough for the creating and running the first project; in case you get stuck some place
- https://developer.android.com/things/sdk/samples.html
Android Things Review
Its still a developer preview and its not fair to give any final verdict; however it feels and smells a lot like Windows 10 IoT with Windows 10 IoT a bit more mature and attractive due to its Node.js support etc. Given Raspberry PI is capable of doing a lot; Rasbian / PIXEL has shown this; and I think Raspberry PI like Single Board Computers deserves better Windows 10 IoT and Android Things; may be Windows 10 Core with proper Shell / Store / Apps as free version and Windows 2016 Server Core as commercial version and Android Lite / Core as a complete Android TV like experience minus phone features. Cortana and Google Now makes a lot of sense here as well. The problem with these both Windows 10 IoT and Android Things platforms is; if you want to design a home automation or some similar solution and want to keep things cloud free; you will need a separate Raspberry PI running Rasbian or a PC for things like MQTT or database / web interface etc. However these both OSes have solid User Interface frameworks and can be used as GUI “Consoles” for our IoT solutions
