Blink Series
They say they designed this edition of Windows for Internet of Things; and its part of their “universal device platform” vision. With Anniversary Edition; its now called Windows 10 IoT Core; and is available from https://developer.microsoft.com/en-us/windows/iot; Raspberry Pi 2 and 3 along with couple of other boards are supported. Last time I tried it on Pi 2; and couldn't found the compatible Wifi USB Dongle but thankfully Pi 3 has built in Wifi and it works seamlessly now; they have also improved device compatibility a little.
From the developer portal; you select the supported board and the the Windows version; either Anniversary one or the Insider Preview one; for Anniversary; it downloads the Windows 10 IoT Core Dashboard, a ClickOnce desktop application, using which you can download the OS image and prepare the SD Card. Connect the board with the Ethernet and Dashboard will find it (given you are on in same subnet); once you have the IP; you can open its Device Portal and from there you can change the Administrator password and setup Wifi. Alternately; you can connect the monitor/screen on PI’s HDMI and connect Mouse/Keyboard and setup the Wifi from the console!
- The dashboard offers to set the Administrator password; but in my case it didn't work and OS had default password; which is p@ssw0rd (Zero r d)
For the development; given its part of “universal device platform”; you need Visual Studio 2015 and the Windows SDK for Anniversary Edition. Install the Windows 10 IoT Core Project Templates from https://www.visualstudiogallery.msdn.microsoft.com/55b357e1-a533-43ad-82a5-a88ac4b01dec (or https://marketplace.visualstudio.com/items?itemName=MicrosoftIoT.WindowsIoTCoreProjectTemplates) that installs the C#, Visual Basic and C++ project templates for Background Application (IoT). If you create a C# project using this; it creates a class implementing the required interface having single Run method with IBackgroundTaskInstance parameter. For the “Blink”; we will need a ThreadPoolTimer that will blink our LED using GpIoPin class that we get from GpIoController. These GPIO related classes are in Windows.Devices.Gpio namespace from the Microsoft.NETCore.UniversalWindowsPlatform package that's already setup when we create the project. Here’s the code that we need in the Run()
public void Run(IBackgroundTaskInstance taskInstance)
{
// TODO: Insert code to perform background work
//
// If you start any asynchronous methods here, prevent the task
// from closing prematurely by using BackgroundTaskDeferral as
// described in http://aka.ms/backgroundtaskdeferralvar deferral = taskInstance.GetDeferral();
var gpio = GpioController.GetDefault();
if (null == gpio) return;var pin = gpio.OpenPin(17);
if (null == pin) return;pin.SetDriveMode(GpioPinDriveMode.Output);
var toWrite = GpioPinValue.High;
var timer = ThreadPoolTimer.CreatePeriodicTimer(delegate
{
pin.Write(toWrite);
if (toWrite == GpioPinValue.High)
toWrite = GpioPinValue.Low;
else
toWrite = GpioPinValue.High;
}, TimeSpan.FromMilliseconds(1000));
}
- LED’s Positive/Anode side is connected to BCM GPIO 17 (GPIO0) / Header Pin 11 and its Negative/Cathode side is connected to Header Pin 6 (OV) similar to /posts/blink.html (Raspberry Pi Pin Layout is given on this previous post)
- Given this background task will get triggered “once” and there is no “loop” concept like in Arduino; we need to setup a timer for LED blinking, and we want to continue to run our task while timer is “ticking” we can get “Deferral” from taskInstance and if we do that and don't call its “Commit” our task will continue to run.
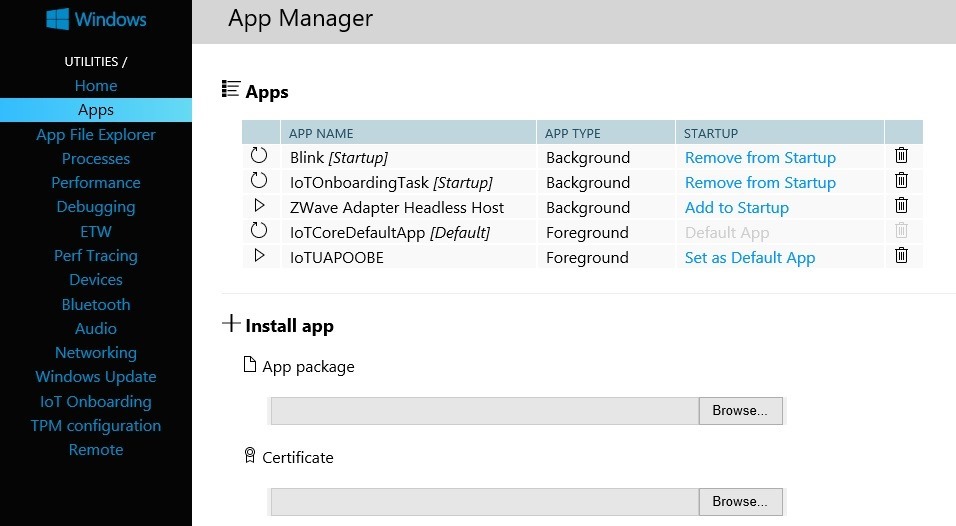
We can use Visual Studio to deploy and run the application (select ARM and Remote Machine) or we can create App Package (Project > Store) and upload our application and its certificate using the “Device Portal”. Using the Device Portal; we can also set it up as “Startup” application so it will run automatically on boot.

- https://developer.microsoft.com/en-us/windows/iot/docs/backgroundapplications has more information developing background applications
Given its; Windows; we can make our Blink application as a typical User Interface / Forground as well; and can have routine XAML based visual interface in the application to blink the LED. https://developer.microsoft.com/en-us/windows/iot/samples/helloworld has information on such application along with how you can use PowerShell to make your Forground application as the Default App; (replacing the default Console Shell / Launcher) etc
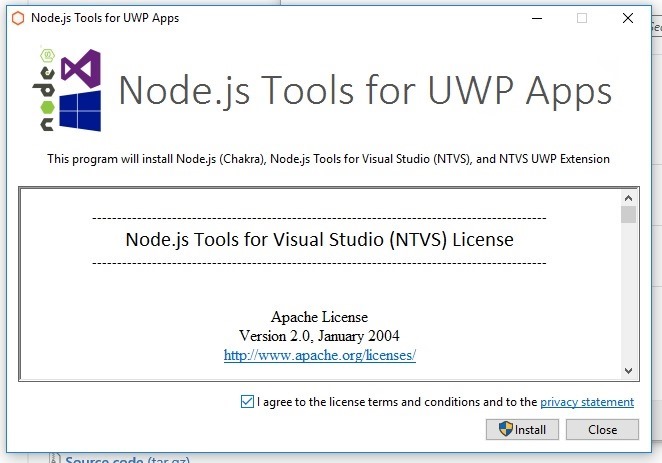
Another interesting development option is Node.js (Chakra build) on Windows 10. Node.js uses Chrome’ Javascript engine; Microsoft open sourced its Edge’ Javascript engine Chakra; and there exists https://github.com/nodejs/node-chakracore that let Node.js uses Chakra. https://www.npmjs.com/package/uwp NPM package allows us to access Universal Windows Platform (UWP) apis from Node.js (Chakra build) on Windows 10; including Windows 10 IoT Core. We can install Node.js Tools for Visual Studio (NTVS) that enables a powerful Node.js development environment within Visual Studio and there exists NTVS UWP Extension that enables deploying Node.js + our app as a UWP application to Windows 10; including Desktop, Mobile and IoT.

Installing Node.js Tools for UWP Apps; takes care of everything; it will install Chakra Node.js, NTVS and NTVS UWP Extensions
- I didn't added Chakra Node.js into PATH; as I already had a “normal” Node.js in the PATH and didn't wanted to disturb my other project; and this doesnt affect NTVS UWP Projects and they work fine

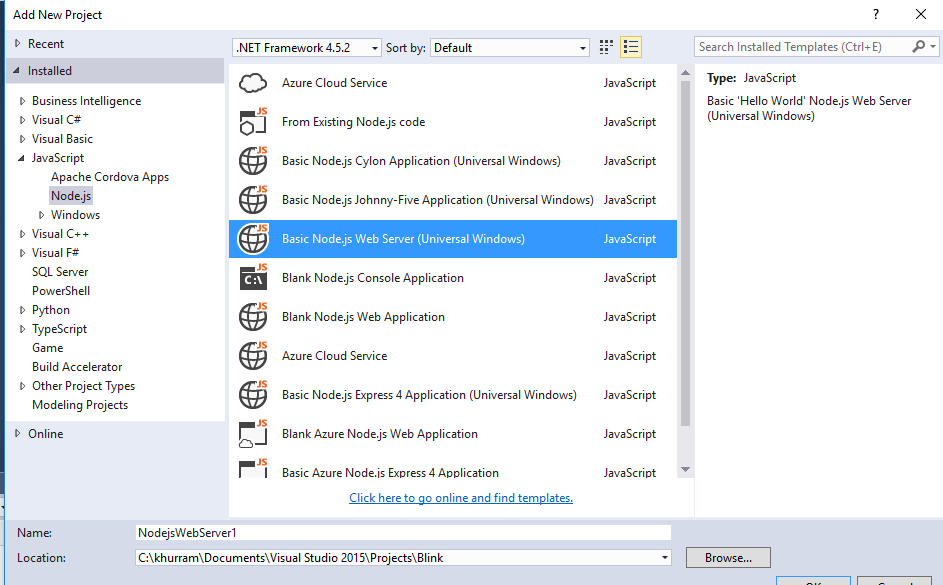
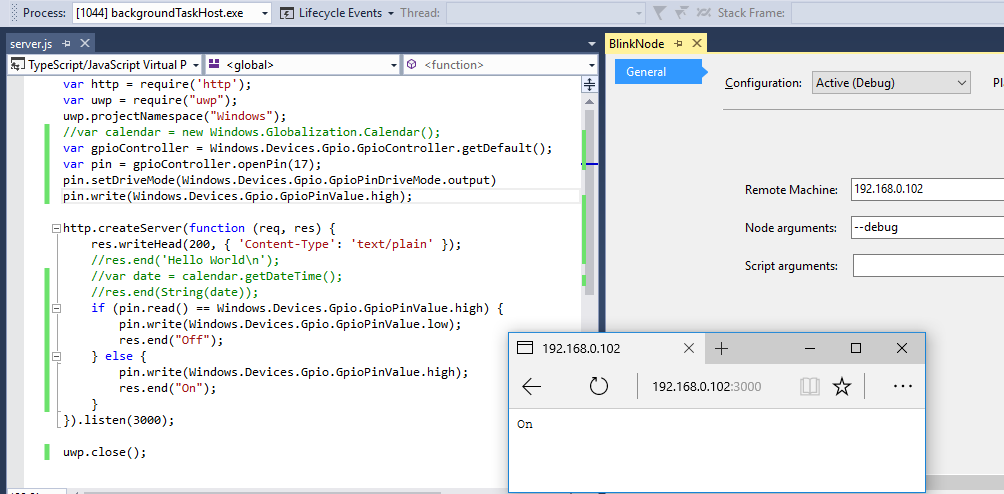
NTVS UWP Extensions also installs some nice collection of Project Templates. For my Blink; I used Basic Node.js Web Server (Universal Windows) project template and it had uwp npm module already setup. I simply wrote these lines in the server.js
var http = require('http');
var uwp = require("uwp");
uwp.projectNamespace("Windows");
var gpioController = Windows.Devices.Gpio.GpioController.getDefault();
var pin = gpioController.openPin(17);
pin.setDriveMode(Windows.Devices.Gpio.GpioPinDriveMode.output)
pin.write(Windows.Devices.Gpio.GpioPinValue.high);http.createServer(function (req, res) {
res.writeHead(200, { 'Content-Type': 'text/plain' });
if (pin.read() == Windows.Devices.Gpio.GpioPinValue.high) {
pin.write(Windows.Devices.Gpio.GpioPinValue.low);
res.end("Off");
} else {
pin.write(Windows.Devices.Gpio.GpioPinValue.high);
res.end("On");
}
}).listen(3000);uwp.close();
- Notice the use of uwp and that it needs to be close() at the end
- Notice how we got referenced to gpioController and pin; and how their naming is Javascript friendly camel Cased
- We kept things simple; on each reload; the LED switches from On to Off and vice versa; we can have buttons like ESP8266 web interface we did in previous post

Thanks to NTVS UWP Extensions; the project template offers UWP projects like Visual Studio integrations for debugging / running and deploying the application to remote machine (Windows 10 IoT) and packaging the application etc.
Windows 10 IoT Resources
- https://developer.microsoft.com/en-us/windows/iot/samples
- https://blogs.windows.com/buildingapps/tag/iot
- https://microsoft.hackster.io/en-US
NTVS UWP Extension Resources
- https://developer.microsoft.com/en-us/windows/iot/samples/helloworldnode
- https://developer.microsoft.com/en-us/windows/iot/samples/helloblinkynode
Windows 10 IoT Review
Windows 10 IoT Core is okay; it can become better if they provide Windows 10 like “Start” screen / launcher with Notifications, proper Command Prompt + PowerShell, File Explorer, Settings, Application Installer and Task Scheduler. PowerShell remoting is too cryptic and SSH is industry standard; Windows badly needs SSH Server for headless deployments. They should also revitalize ClickOnce; its a great enterprise grade auto-update platform; and can be used to update “Metro or IoT Apps” in personal / enterprise scenarios. Say if I develop an IoT solution for a farmer who is not that tech savvy; if he asks me to make some changes or add features; its too complicated to update the apps on the devices remotely. We can use Windows Store; but its too demanding and doesn't fit everywhere
There is no “Server Side” stuff; given Rasbian is a solid OS on Raspberry Pi and we can deploy mySQL, Apache, MQTT broker and what not. Microsoft should bring their server offerings to such single board computers; make at least IIS and ASP.NET Core available on it; SQL Express, MSMQ (with MQTT support) and some file syncing tools / solution would be appreciated. Currently it feels more like a “terminal” for their Azure offerings and not everyone wants to connect to the “Cloud”. For designing such solutions we need a separate Raspberry PI running Rasbian or a PC / Server for things like MQTT, database and web interface etc.
- I had Cortana in the list above; but in latest Insider builds; its there
- My son would like to connect the XBox Controller to PI’s USB and play games from Windows Store on the PI connected to big screen; XBox is a great gaming console; but PI is a nice Media Center on Linux platform; and “Windows” has solid foundation and with casual games, TV Shows and Movies from Windows Store; this can become a “thing”